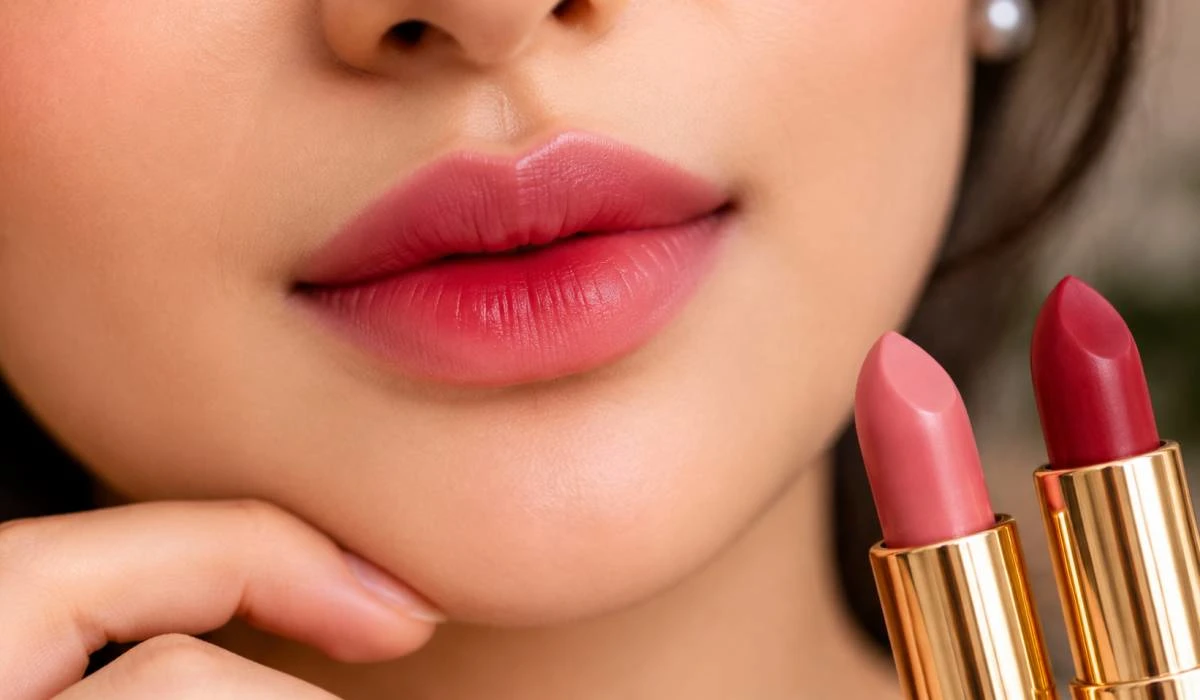
Ombre lips look like you spent an hour on them. You did not, two lipsticks, one finger, five minutes, that is the whole secret. I avoided ombre for years, thought it needed a makeup artist and airbrushing, then a friend showed me in a wedding bathroom, two shades, dabbed with a finger, done, looked like a salon job, I was annoyed I had not tried it sooner.
This ombre lips tutorial for beginners is the version I wish I had then, no tools you do not own, no ten step process, just two colours, a light hand, and one rule about blending.
What Ombre Lips Actually Are?
Two shades on one lip. Darker at the outer corners. Lighter in the centre. The colour fades from one to the other. No hard line between them.
The effect. Lips look fuller. Poutier. More dimensional. That is why it is popular for photos and weddings.
It works on every lip shape. Thin lips. Full lips. Uneven lips. Small lips. The centre highlight makes lips look bigger. The dark edges make them look defined. That is the whole idea. Light in the middle. Dark on the sides.
Read More: Birthday Makeup Tutorial for Beginners: Simple Party Makeup
Ombre Lips Tutorial for Beginners Step by Step
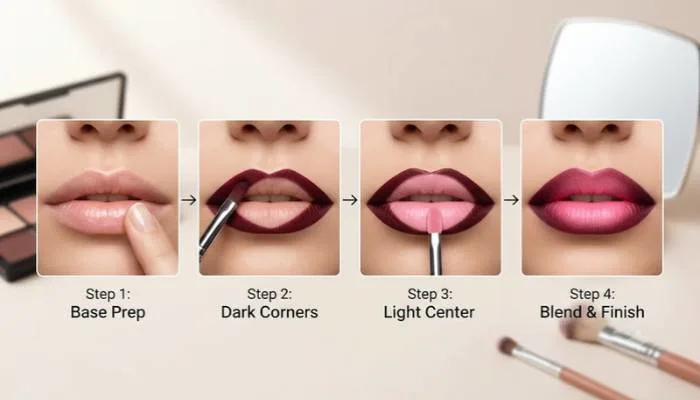
Follow this exactly. Do not skip steps.
- Step 1. Prep the lips. Scrub gently with a wet toothbrush or a lip scrub. Then apply lip balm. Wait five minutes. Wipe off the extra balm. Dry lips make ombre look patchy. This step matters more than people think.
- Step 2. Apply concealer on the lips. Thin layer. This gives a blank canvas. It also makes the colours show true. Blend the edges into your skin so there is no white line.
- Step 3. Set with a little powder. Light dusting. This stops the lipstick from sliding.
- Step 4. Apply the dark shade first. Not the light one. This is the rule nobody tells you. Dark first, light second. Why? Because light shades are easier to blend over dark. The other way round gets muddy.
- Apply the dark shade on the outer corners and along the lip line. Leave the centre bare. Press it in with your finger. Do not use the bullet directly. Fingers give more control.
- Step 5. Apply the light shade in the centre. Just the middle. Upper and lower lip. Do not go near the corners.
- Step 6. Blend the meeting point. Tap with your finger. Small taps. Not rubbing. Rubbing mixes the two shades into one flat colour. Tapping keeps them separate but soft.
- Step 7. Clean the edges. Cotton bud. Small amount of concealer. Go around the lip line. This makes the shape sharp.
- Step 8. Add gloss if you want. Centre only. Not the corners. Gloss in the centre makes the pout pop.
Done. Eight steps. First few times will take ten minutes. After five tries, five minutes.
How to Do Ombre Lips with 2 Lipsticks?
This is the classic method. Two lipsticks. One dark. One light.
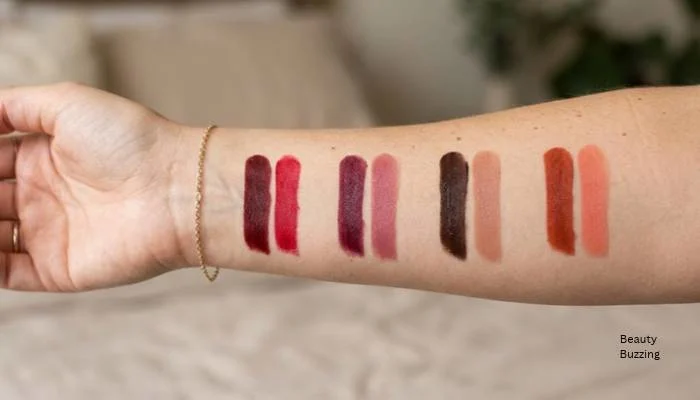
The pairing matters. Pick shades in the same family. Dark red with light red. Dark brown with nude. Deep berry with soft pink.
Do not mix families. Orange with pink looks strange. Red with brown looks muddy. Stay in one colour family.
- The finger method. No brush needed. Apply dark on the outer corners. Apply light in the centre. Tap the meeting point with your finger. That is it.
- The brush method. Better control. Use a small flat brush. Apply dark. Clean the brush. Apply light. Blend the middle with a clean brush. Takes longer. Looks sharper.
- The tissue method. Apply dark all over. Blot with tissue. Apply light in the centre. Blot again. The colour builds in layers. Lasts longer.
For beginners, the finger method is best. No tools. No risk.
How to Do Ombre Lips with Lip Gloss?
Gloss is easier than lipstick. More forgiving. But it fades faster.
Method.
- Apply a dark lip liner on the outer corners. Not the whole lip. Just the corners and the outer edge.
- Apply a light gloss in the centre. Blend with the applicator.
- That is it. Two steps. The liner stays. The gloss gives shine.
- One problem. Gloss moves. It travels to the corners over time. So this look lasts two to three hours. Not all day.
Fix. Use a lip stain as the base. Then gloss on top. The stain holds the colour. The gloss adds shine.
Another version. Two glosses. Dark gloss on the outer. Light gloss in the centre. Blend the middle with a finger. This is the easiest version. But it fades fastest.
For beginners, start with gloss. It is hard to mess up. Then move to lipstick when you want longer wear.
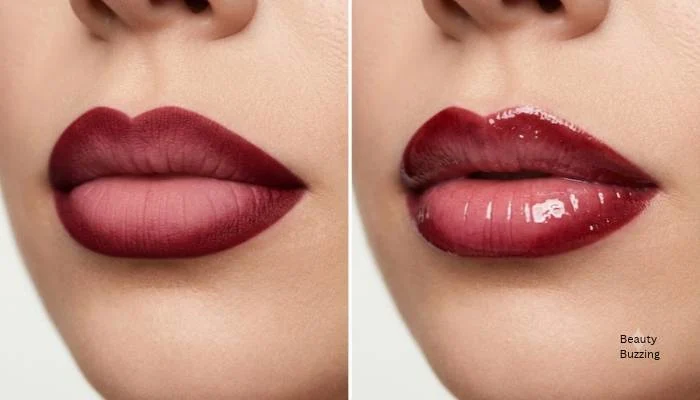
Easy Ombre Lips Tutorial for Beginners
- If the eight step version feels like too much, here is the shortcut.
- Two lipsticks. Dark on the outer corners. Light in the middle. Tap with finger. Done.
- That is it. No concealer. No powder. No brush. No cotton bud.
- It will not look perfect. The edges will not be sharp. But it will look like ombre. And nobody will inspect your lip line at a dinner.
- This is the version I use when I am running late. Three minutes. Works every time.
- Another shortcut. Use a tinted lip balm in the centre. Dark lipstick on the corners. The balm is soft so it blends on its own. No finger needed.
Ombre Lips Permanent Makeup
This is different from the makeup version. Permanent makeup is a cosmetic tattoo. A technician deposits pigment into the lips. The result is ombre lips that last one to three years.
It is not a home thing. It is a procedure. Done at a clinic or a salon with proper certification.
What to know before you book?
- It costs money. In India, anywhere from eight thousand to thirty thousand rupees depending on the clinic and city.
- It takes two to three sessions. Not one. The first session is light. The second adds colour. A third may be needed for touch up.
- It hurts. Numbing cream is used. But it is still a needle on the lips. Do not believe anyone who says it is painless.
- There is downtime. Lips swell. They peel. They look dark before they settle. Two weeks before the final colour shows.
- It is semi-permanent. Not forever. Fades over one to three years. Needs touch ups.
Who should avoid it?
- Pregnant women. People with cold sores. People with auto immune conditions. People who scar easily anyone who might change their mind about the colour.
- Do your research. Ask for before and after photos. Ask how many years the technician has been doing it. Ask what pigment brand they use. Do not book on price alone. Cheap permanent makeup often means cheap pigment and a bad result.
- This is not a beginner project. The makeup version is for beginners. The permanent version is for people who have thought about it for months.
You May Also Read: 10 Minute Makeup Tutorial for Beginners: Easy Steps
What Colours to Pair?
This confuses people. So here is a simple guide.
- Red family. Dark red with light red. Or deep red with soft pink. Classic. Works on everyone.
- Brown family. Dark brown with nude. Soft. Natural. Good for daily wear.
- Berry family. Deep berry with soft pink. Bold. Good for evenings.
- Orange family. Burnt orange with peach. Good for warm skin tones.
- Pink family. Deep pink with baby pink. Young. Fun. Good for day events.
Skip. Red with orange. Pink with brown. Anything with a blue lipstick unless you know what you are doing.
Common Mistakes
- Light first. Wrong. Dark first, light second. Always.
- Rubbing instead of tapping. Rubbing mixes the colours into one flat shade. Tap. Small taps.
- Dry lips. Ombre on dry lips looks patchy. Prep first. Every time.
- Too much product. Thick layers mix together and slide. Thin layers stay separate.
- Going too dark on the corners. It looks like you ate something. Keep the dark shade close to the lip line. Not a thick band.
- Skipping the concealer on the edges. The lip line gets messy. One cotton bud fixes it.
- Not matching the family. Red and orange together looks strange. Stay in one family.
Quick Table
| Method | Time | Lasts | Best for |
|---|---|---|---|
| Two lipsticks, finger | 4 min | 5-6 hours | Beginners, daily |
| Two lipsticks, brush | 8 min | 6 hours | Events, photos |
| Liner plus gloss | 2 min | 2-3 hours | Quick looks |
| Two glosses | 2 min | 1-2 hours | Parties, short events |
| Permanent makeup | 2-3 sessions | 1-3 years | Long term, clinic only |
FAQs
1. Easiest way to do ombre lips?
Two lipsticks, dark corners, light centre, tap with finger
2. Dark or light first?
Dark first, always, light blends over dark, not the reverse.
3. Can I use gloss?
Yes, liner on corners, gloss in centre, lasts two hours only.
4. Which shades pair well?
Same family, red with red, brown with nude, don't mix
5. Is permanent ombre safe?
Yes, at a certified clinic, it hurts, two sessions, fades in years
6. How to make it last?
Concealer base, Powder, Lip stain under, Blot between layers
7. Why patchy?
Dry lips Scrub first, Balm, Wait five minutes, Thin layers only
8. Can beginners do it?
Yes, easier than winged liner, Practice five times at home.