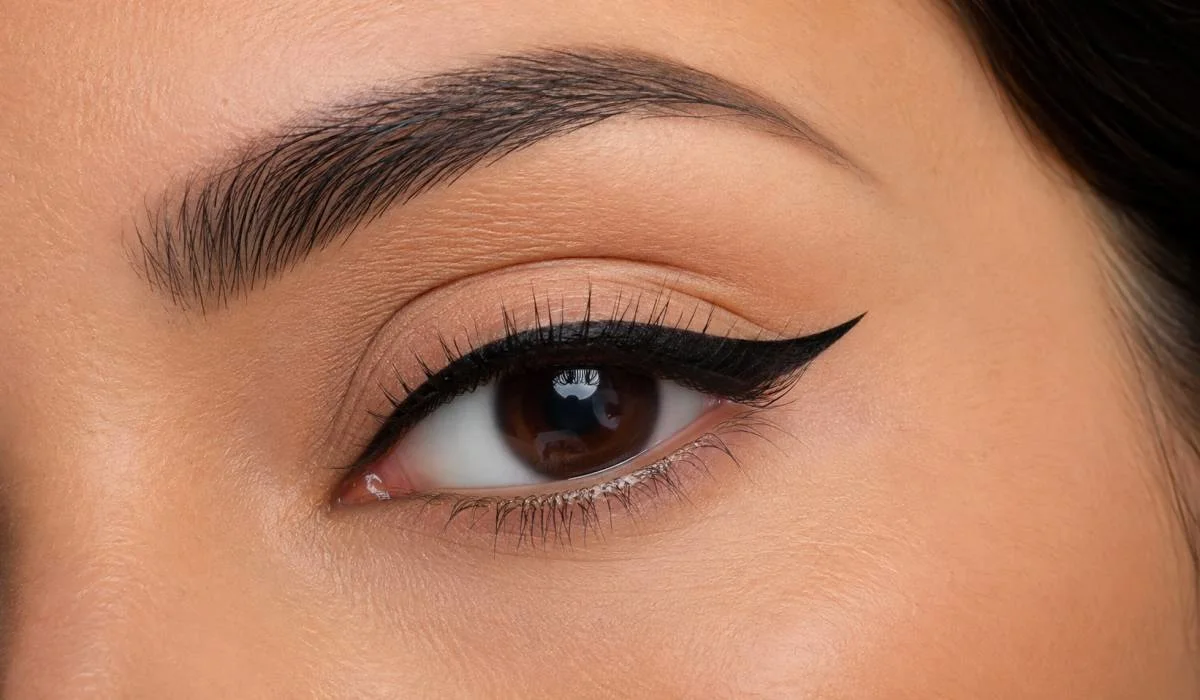
I have messed up winged eyeliner so many times. One eye perfect. Other eye a mess. Trying to fix it and making it worse. Ending up with thick black lines that looked nothing like a wing. Honestly, it was so frustrating. I almost gave up. But I kept practicing.
Tried different techniques. Watched tutorials. Asked makeup artists for help. And finally I figured it out. Now I can do it in two minutes. Both eyes match. No stress. So I am sharing exactly what I learned. This winged eyeliner tutorial easy step by step guide is for everyone. Beginners, hooded eyes, shaky hands. Simple steps that actually work.
What You Need?
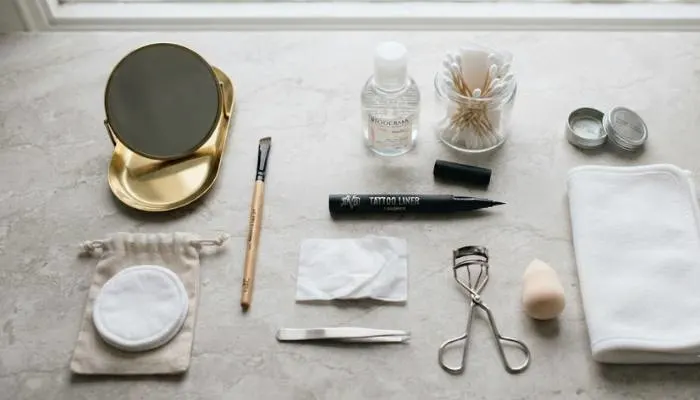
Before you start, get these things ready:
- Liquid eyeliner or gel eyeliner with a brush
- Small angled brush if using gel
- Cotton buds or q-tips
- Micellar water or makeup remover
- A small mirror
- Tape or a spoon (optional for beginners)
That is it. You do not need expensive products. Just something that works for you.
Read More: Glitter Eye Makeup Tutorial: Easy Guide for Beginners
Winged Eyeliner Tutorial Easy Step by Step for Beginners
This is the method I use. It works every time.
Step 1: Get Comfortable
Sit in front of a mirror. Rest your elbow on a table. This keeps your hand steady. Use a small handheld mirror if you want. Angle it slightly downward so you can see your lash line clearly.
Step 2: Start with the Outer Corner
Draw a small dot at the outer corner of your eye. This marks where the wing will end. Keep it small. You can always make it bigger but you cannot make it smaller.
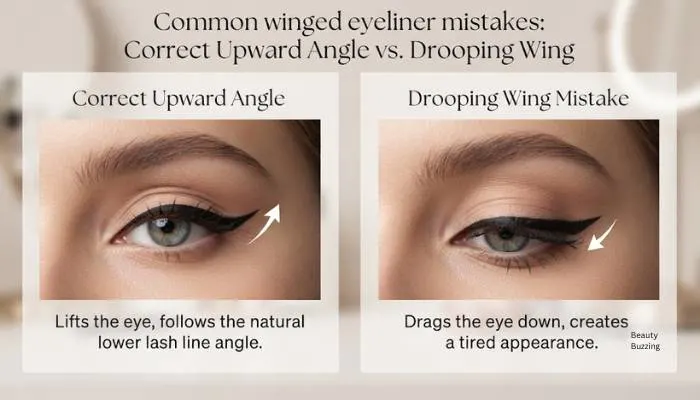
For the wing angle, look at your lower lash line. Imagine a line extending from your lower lash line upward. That is the direction of your wing. Follow that angle.
Step 3: Draw a Line from the Wing to Your Lash Line
Start from the outer corner and draw a line toward the middle of your lash line. Do not draw all the way to the inner corner yet. Just half way.
Keep the line thin. Close to your lashes. You can always thicken it later.
Step 4: Draw the Top of the Wing
Connect the tip of your wing back to your upper lash line. This creates a triangle shape. Fill in the triangle with your liner.
Step 5: Connect to the Inner Corner
Now draw a thin line from the middle to the inner corner of your eye. Keep it as close to your lashes as possible. Do not make it thick.
Step 6: Fill in Any Gaps
Look at your lash line. See any skin showing between the liner and your lashes? Fill those gaps. Tightline if needed.
Step 7: Clean Up
Take a cotton bud dipped in micellar water. Clean up any mistakes. Shape the wing if it needs fixing.
Step 8: Check Both Eyes
Do your other eye. Compare. Make small adjustments if needed.
How to Do Winged Eyeliner for Beginners with Liquid?
Liquid eyeliner can be scary. But it is actually easier once you know the tricks.
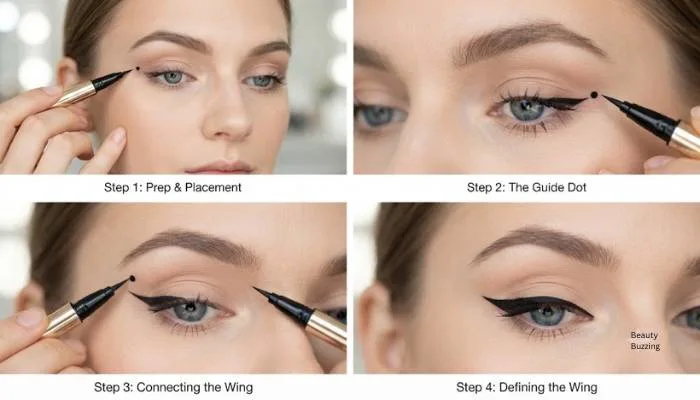
Tip 1: Start with Dots
This is the easiest way. Make three dots. One at the inner corner. One at the middle. One at the outer corner. Then connect them.
This breaks the line into small pieces. Less intimidating. You get a straight line every time.
Tip 2: Use an Angled Mirror
Look down into a mirror when drawing. This pulls your eyelid tight. Your lash line becomes straight. Easier to draw a smooth line.
Tip 3: Do Not Stretch Your Eyelid
I used to pull my eye tight when drawing. But when you let go, the wing looks different. So keep your eye relaxed. Draw with small strokes.
Tip 4: Start Thin
You can always add more. Start with a thin line and build up if you want it bolder.
Tip 5: Use a Felt Tip Pen
Felt tip liners are easier to control than brush tip ones. Start with that as a beginner. You can try brush tip later.
Winged Eyeliner Tutorial Easy Step by Step for Hooded Eyes
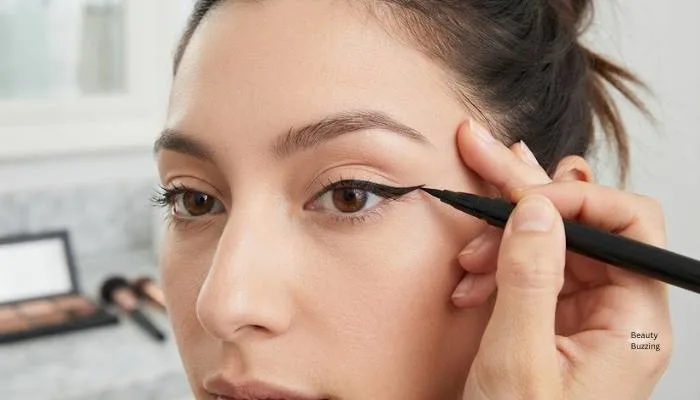
Hooded eyes are a challenge. I have them too. The technique is different.
The Problem
When you have hooded eyes, your eyelid folds over at the outer corner. This makes the wing disappear when your eyes are open. So you need to draw the wing with your eyes open.
Step 1: Draw with Eyes Open
Look straight into the mirror. Keep your eyes open. Draw the wing shape first. Do not close your eyes to draw.
Step 2: Draw the Wing Straight Out
For hooded eyes, draw the wing straight out to the side instead of upward. This avoids the fold. Do not angle it up too much.
Step 3: Fill in with Eyes Closed
Now close your eyes. Connect the wing to your lash line. Fill in any gaps.
Step 4: Keep the Line Thin
Thick lines look heavy on hooded eyes. Keep the liner thin. It makes your eyes look bigger.
Step 5: Use Less Product
Do not put liner all the way across. Stop in the middle. This opens up your eye.
Step 6: Practice the Bat Wing
Some people with hooded eyes do the bat wing technique. You draw the wing shape first while looking straight. Then fill it in. It looks like a bat wing when your eyes are closed but looks perfect when open.
Common Mistakes and How to Fix Them
Mistake 1: Wing Too Low
If your wing droops down, it makes your eyes look tired. The wing should angle upward toward the end of your eyebrow.
Mistake 2: Wing Too Long
A really long wing looks odd. Keep it proportional to your eye. A good rule is the wing should be about half the length of your eye.
Mistake 3: Both Eyes Different
This happens to everyone. Do one eye first. Then the other. Do not try to do both at once. Compare and adjust.
Mistake 4: Smudging
Set your liner with a matching eyeshadow. This stops smudging. Use a small brush to pat eyeshadow over the liner.
Mistake 5: Skipping the Inner Corner
The inner corner should be thin. If you make it thick, your eyes look smaller. Keep it close to your lashes.
You May Also Read: Siren Eyes Makeup Tutorial: Lifted Eyes for Hooded Eyes
Different Wing Styles
- Small Wing - Great for everyday. Just a tiny flick at the end. Subtle but still gives lift.
- Bold Wing - Thicker line and longer wing. Dramatic and glamorous.
- Puppy Wing - The wing goes downward. Gives a cute, youthful look.
- Graphic Wing - Thick and intense. Sharp edges. Edgy and modern.
- Double Wing - Two wings stacked. Very bold. Not for beginners.
Product Recommendations
- For Beginners - Maybelline Hyper Sharp Wing Liquid Eyeliner. Easy to use. Good control.
- For Hooded Eyes - Benefit They're Real Push Up Liner. Good precision.
- For Smudge Proof - Stila Stay All Day Waterproof Liner. Lasts all day.
- Budget Option - Lakme Eyeconic Liquid Liner. Good quality at low price.
- Gel Liner - Inglot AMC Gel Liner. Smooth and long lasting.
Final Words
Winged eyeliner is a skill. It takes practice. I messed up so many times before I got it right. Now it takes me two minutes.
Start simple. Use dots. Keep your hand steady. Clean up mistakes as you go. Do not stress about perfection. It will come with time. Remember, nobody sees your mistakes as much as you do. From a normal distance, small imperfections are not visible. So do not obsess.
FAQs
1. What is the easiest way to do winged eyeliner?
Use dots. Make three dots and connect them. This breaks the line into small pieces. Much easier.
2. How do I get both wings even?
Do one eye completely first. Then the other. Compare and adjust. A small mirror helps.
3. What if I mess up?
Use a cotton bud with micellar water to clean mistakes. Then start again. Practice makes perfect.
4. How do I do winged eyeliner on hooded eyes?
Draw the wing with your eyes open. Draw it straight out, not upward. Keep the liner thin.
5. What is the best eyeliner for beginners?
Felt tip liquid liners are easiest. Maybelline Hyper Sharp is good for beginners.
6. How do I stop eyeliner from smudging?
Set with a matching eyeshadow. Also use waterproof formulas. Avoid oily eye creams.
7. How long should the wing be?
About half the length of your eye. Not too long. Not too short.
8. What shape wing is best for my eye shape?
Round eyes - small thin wing. Almond eyes - any shape works. Hooded eyes - straight out wing.