Curious well-nigh how to do ombre nails? We have got you covered. The Instagram nail art videos are oddly satisfying and make you want those perfect nails. The ombre effect is quite a tricky artwork, and you may want the assistance of an expert if you are a beginner. But did you know that you can master this art from the repletion of your home? We have compiled a list of uber-easy DIY nail art tutorials withal with 5 trappy designs. You can create them with or without sponges. So, indulge your inner versifier and get ombre gradient nails at home. Swipe up!
How To Do Ombre Nails: Step-By-Step Tutorial (Pictures)
If you are a beginner, it is weightier to start with the original French ombre. The difference between a French manicure and a French ombre is that the white nail tips gradually longish into the mankind or a nude wiring instead of a stark stardom between the white nail tip and the nail base. This may sound intimidating, but you can hands do it with this step-by-step tutorial (with pictures). Swipe up!
What You Need
- Base stratify (clear nail polish)
- White nail polish
- Nude or flesh-toned nail polish
- Liquid latex tape
- Nail polish remover
- A small skim or a Q-tip
- Disposable makeup sponge
- Top coat
Step 1: Wield The Wiring Coat
Start with manicured nails. Wield the wiring stratify to protect your nails and let them dry.
Step 2: Wield The Nude Or Flesh-Toned Nail Polish

Apply two coats of nude or flesh-toned nail polish and let it dry.
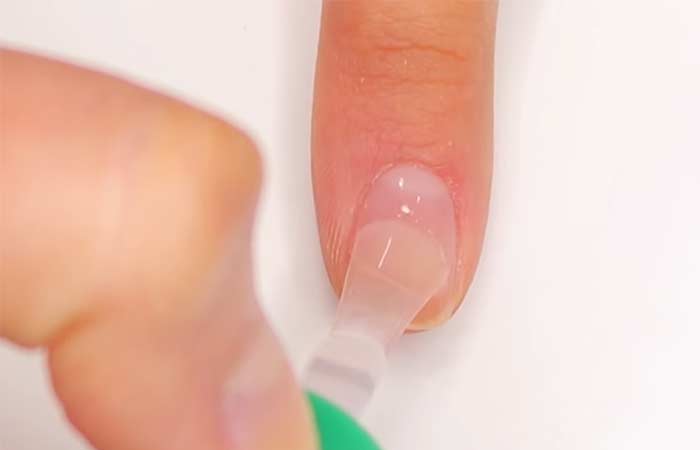
Step 3: Wield The Liquid Latex Tape To The Cuticles

Apply the liquid latex tape virtually your nails. It protects the skin from the mess and peels off easily. Wait for it to dry surpassing moving on to the next step.
Step 4: Wield The White Nail Polish To The Sponge

Layer a generous value of the white nail polish on the tip of the removable sponge.
Step 5: Wield The Nude Or Flesh-Toned Nail Polish To The Sponge

Layer a generous value of the nude or flesh-toned nail polish unelevated the sponge tip to create a gradient effect.
Step 6: Dab The Sponge Onto The Nail

Hold the sponge so that the white nail polish is at the nail tip and dab it onto your nails.
Step 7: Repeat Steps 5 And 6

Layer some increasingly nail polish on the sponge and stamp it over your nails to get the desired verisimilitude intensity. Let it dry surpassing moving on to the next step.
Step 8: Remove The Liquid Latex Tape

Peel off the liquid latex tape using a skim or your fingers.
Step 9: Wield The Top Coat

Apply the top stratify to smooth out any texture and requite your nails a shiny look.
Final Result

There you have it – trappy French ombre nails. You can use multiple colors to create an ombre effect or glamorous glitter ombre nails. The pursuit videos will help you understand how to create colorful ombre nails and glitter ombre. Scroll lanugo to trammels them out.
How To Do Colorful Ombre Nails At Home (Video)
French ombre is classic. But if your heart reaches out for other colors and not just nude shades, go all-in with your verisimilitude sense to create trappy ombre nails at home. Trammels out the pursuit video to get inspiration and a few tips for colorful gradient nails.
Ooh! That looks super good! But, if you do not want to create a glitter ombre without a sponge, we have a tutorial. Just alimony scrolling!
5 Ways To Do Ombre Nails With And Without A Sponge (Video)
Using a sponge is a popular way to create ombre nails. But you can moreover use the polish skim tip to create ombre nails with regular nail polishes or glitter nail polishes. Trammels the pursuit video out to get a 360 of all the options you have to create ombre nails at home.
Scroll lanugo to explore a few ombre nail diamond ideas and how to do them hands at home.
5 Weightier Ombre Nail Diamond Ideas
1. Deep Red And Woebegone Ombre Nails

Shutterstock
Red and woebegone ombre nails make for the perfect Halloween manicure. If you are not fond of this verisimilitude combo, you can combine white and red for a increasingly Valentine’s Day feel. The deep red looks extremely stylish and feminine. Here’s how you can recreate this design.
DIY Step-By-Step Process
Step 1: Wield a layer of wiring stratify and indulge it to dry.
Step 2: For your wiring color, wield deep red nail polish.
Step 3: Wield the same red and woebegone nail polish on a sponge. Dab it onto your nails to create an ombre effect.
Step 4: Clean up virtually the nails.
Step 5: Wield a gel or a matte top coat.
2. Silver And Pink Glitter Ombre Nails

Shutterstock
Want to style your ombre nails with a glitter accent? This diamond does that perfectly with a subtle silver glitter nail polish on the vocalizing fingernail. It is a walkover to recreate and can be washed-up using a set of variegated colors.
DIY Step-By-Step Process
Step 1: Wield the white nail polish as the wiring coat.
Step 2: Wield the pastel pink and white nail paints on the sponge and dab it onto your nail.
Step 3: Repeat the step to intensify the ombre effect.
Step 4: Wield the silver glitter nail polish to your vocalizing nail.
Step 5: Secure your manicure with a gel finish top coat.
3. Metallic Ombre Nail Design

Want to glam up your outfit? This metallic ombre nail diamond will do the trick. It is not over-the-top but just the right value of classy! Requite this a shot if you have something special coming up.
DIY Step-By-Step Process
Step 1: Paint your nails with champagne or gold glitter nail polish and let them dry.
Step 2: Wield liquid latex virtually the nails.
Step 3: Wield some woebegone and gold polish to your wedge sponge and gently dab it onto the nail edges.
Step 4: Once you are satisfied with the ombre effect, wield a layer of top stratify to secure the manicure.
Step 5: Clean up the sides of your nails with a thin skim and some acetone.
4. Ombre Sunshine Nail Design

This ombre nail diamond is a must-try for your next waterfront holiday. The yellow, orange, and pink tousle beautifully to requite you this summer sunshine look.
DIY Step-By-Step Process
Step 1: Wield a wiring stratify to protect your nails.
Step 2: Wield a white wiring verisimilitude for the weightier gradient opacity and indulge it to dry.
Step 3: Wield liquid latex virtually the nails.
Step 4: Wield three stripes of verisimilitude to your makeup sponge, permitting the colors to overlap slightly.
Step 5: Dab it onto your nail and let the first layer dry. Reapply the colors onto the sponge and repeat the step.
Step 6: Finish off with a top stratify to tousle the gradient.
Step 7: Peel off the latex. Well-spoken the edges virtually the cuticles with a skim and acetone.
5. Watercolor Ombre Nails

If you do not have a sponge or any other tools for your DIY nail art project, you can still do something very cool! These gorgeous watercolor ombre nails do not require any tools.
DIY Step-By-Step Process
Step 1: Wield a layer of wiring coat.
Step 2: Wield the first verisimilitude to one half of your nail.
Step 3: Surpassing the first verisimilitude dries, wield the second verisimilitude to the other half of your nail.
Step 4: Take the same two colors with a skim and tousle them on a glass base.
Step 5: Wield the blended colors to your nails for a watercolor effect.
Step 6: Finish with a topcoat.
While single-color painted nails have their own charm, an ombre effect adds increasingly pizzazz. You can dial up the effect or tone it lanugo using muted or vibrant shades to reflect your current mood. Think of your nails as your canvas and let your creativity take over. Get your polishes out and create nail art that’s nothing short of a masterpiece.
Key Takeaways
- The effect in which two or increasingly colors seamlessly tousle into one flipside is tabbed ombre.
- In French ombre, the white nail tips gradually longish into a nude base.
- You can create an ombre effect with variegated colors, metallic shades, and glitter as well.
- You can moreover do ombre nails with or without a sponge.
Infographic: How To Do Ombre Nails Using Dip Powder
Ombre nails can take your nails from drab to fab. You can experiment with variegated shades of ombre equal to mood, season, and occasion. The good news is you can get these trappy ombre nails washed-up from the repletion of your home. We have given a detailed tutorial on how to get ombre nails using dip powder.
Check out the infographic unelevated to know more.
![how to do ombre nails using dip powder [infographic]](https://cdn2.stylecraze.com/wp-content/uploads/2022/09/How-To-Do-Ombre-Nails-Using-Dip-Powder.jpg)
Illustration: StyleCraze Diamond Team
Ombre nails start light-hued at the top and transude into a darker verisimilitude at the bottom. However, you can moreover play virtually with vertical and diagonal ombre nail art. Experiment with verisimilitude combinations and nail art traps like glitter, rhinestones, stickers, etc. Don’t be shy to try out faux nails, expressly if you have small or vitreous nails. Faux nails indulge you to experiment thoroughly without worrying well-nigh rabble-rousing your real nails. As you read up and practice how to do ombre nails, you will wilt a pro at acing this nail art trend. Then you can get increasingly creative and diamond your unique nail art. So, get to painting your nails into masterpieces!
Frequently Asked Questions
Can you do ombre on real nails?
Yes, you can do ombre on your real nails easily.
Can you do ombre with gel polish?
Yes, you can ombre with gel polish and a makeup sponge but it may take increasingly time and requires practice.
Is ombre gel or acrylic?
While ombre nails are traditionally washed-up using acrylic, ombre is moreover misogynist in gel or dip powder. You can segregate as per your preference.
The post How To Do Ombre Nails Like A Pro: Tutorial With Pictures appeared first on STYLECRAZE.